Avery offers three different ways to print your own labels (and other products):
- You can download a free template and edit it.
- You can download free software to create your labels.
- You can create and print labels online at Avery's website.
To get started, go to the Avery website (Avery.com) and register for a free account if you don't already have one. Note that you don't need to register for an account to create labels, but doing so allows you to store your address online.
If you registered for an account, log in (scroll down the page until you see the login prompt). If not, just continue with the steps below.
On Avery's website is a purple button that reads, "TEMPLATES AND SOFTWARE". Click it and a menu with more options drops down. Select DESIGN AND PRINT ONLINE".

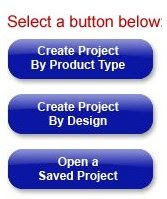
On the next page, you'll notice three purple buttons (show on the right). Choose any button you like, but in order to use the last one, you'll need to have saved projects already (stored on your computer).
Let's start with the top button (Create a Project by Product Type). Click the button and follow the prompts on the next page. On the left under the heading, "Select Category", select the type of project you'd like to create (e.g., address labels). Then on the right, select the right Avery product (8160 and 8167 are very popular). When finished, click the NEXT button.
On the next page, select one of the sample labels. On the next page, click on a label (preferably the top left one). If it's still too small read, click the ZOOM button.
Type your address on the first label. On the left you'll notice other options. You can edit the font (type, size, color, etc.) and you can replace the image with one from Avery's gallery or import one from your own clipart gallery on your computer. The best way to learn these features and how they work is to play with them.
When you're ready to print your labels, click the NEXT button and follow the rest of the prompts.
After printing your project, if you click NEXT again, you'll have the option to save the newly created label project on your computer so that next time you need to print more, you can select the "Open a Saved Project" button above. If you do save your labels, give them a unique name to help identify them.
Here's some tips on using Avery's website and printing labels.
First, their web site is best viewed using Internet Explorer. I use Firefox primarily, and I've noticed that not all the buttons and links function properly when I do. If you notice yourself having problem getting links to work, try opening the site in Internet Explorer.
Secondly, labels print differently on different printers. If you have more than one printer, try printing labels on each to see how they compare. A common problem when printing labels is having the last few rows print off the label. Fixing this problem takes time and patience as you adjust the settings and try printing again (this is why it's a good idea to print on a blank piece of paper before printing on the actual labels).
If you're adding images to your labels, use caution when adjusting size. Resizing images is one of the common causes of printing problems.
That's all there is to it. You can create labels for every occasion using this online tool. Playing around with the different options will help you get comfortable with the site and how it works. You don't have to actually print labels to play with features.

No comments:
Post a Comment